In a previous post, I made the provocative (and ridiculous) claim that anybody with a carpenter’s square and a tape measure could build rectilinear furniture. I blame it on poetic license, because rectilinear or not, good furniture is not easy to build. I followed this claim with a description of a very non-rectilinear vanity that I built for our daughter, Erika, but to be taken even more seriously, when Vicki said that a new and larger dresser for her many clothes would be welcome, I set out to see what I could do. I knew the dresser was going to be full of curves. I mean, how hard could it be, really?
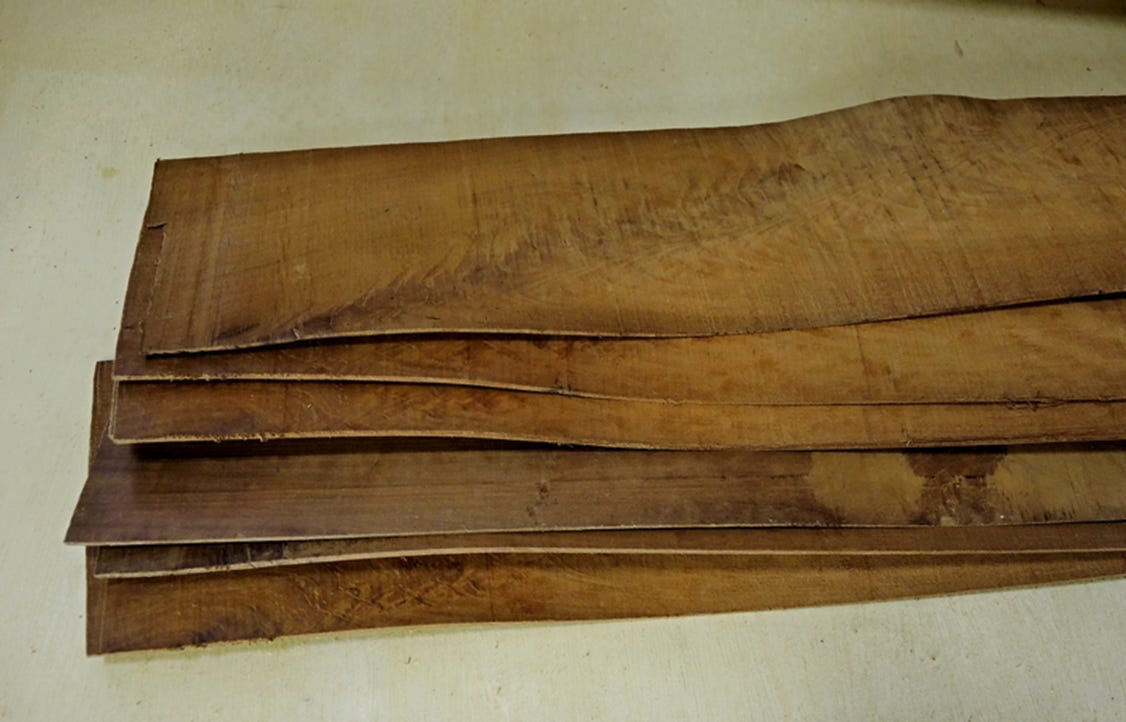
So, I did a crude sketch of a dresser with sides that bowed in and drawers that bowed out. Cherry was the wood of choice, in part because it is wonderful to work, but also because I had stacks and stacks of it, having acquired it by theft and salvage logging. Better yet, I still had a lot of 1/8th inch veneers cut from cherry forks that displayed a beautiful flame pattern. I had used some of it for the top of our dining room table, but once you are infected with “cherry fork lust”, you tend to be on the constant lookout for more forks, your chain saw on constant alert, like a Minute Man of Old. Promising forks needed to be blocked out and dried for a few years, then band-sawed into as many 1/8th inch veneers as still displayed the fancy pattern.
Of course, to design a dresser with curved sides and fronts is one thing, to produce it is another. How can you bend planks three-quarter inch thick, and get them to stay bent? Well, you can’t. Wood is elastic, which means that you can bend it a bit, but when you relieve the bending force, it springs back to its (mostly) original position. If you bend it beyond its native elastic limit, it will break, and then where will you be?
However, if you slice the wood thin enough, it bends quite easily, and by gluing multiple thin layers together in the bent position, they retain their bend. In other words, plywood. The aim of plywood is mostly to eliminate directional weakness and shrinkage, but it can be made into non-flat shapes too.
So, to make my curved sides and drawer fronts, I needed a lot of thin layers. Because only the outermost layers need to be pretty, and the core layers can be made of a cheaper, less pretty wood, such as the heart pine I had a lot of. Not having access to a giant veneer knife, I cut my veneers on a table saw. As the sawblade’s teeth are just under 1/8th inch wide, cutting 1/8th inch veneers turns half of the wood into sawdust, good for mulching flower beds, but not for furniture. Thicker veneers waste less wood, but are stiffer too, so I settled for 1/8th inch, creating a mountain of sawdust under my table saw that eventually spilled out onto my feet. I came to realize that veneers were essentially a by-product of making sawdust, but after enough sawdust, I had enough stacks of 1/8th inch veneers to build the dresser.
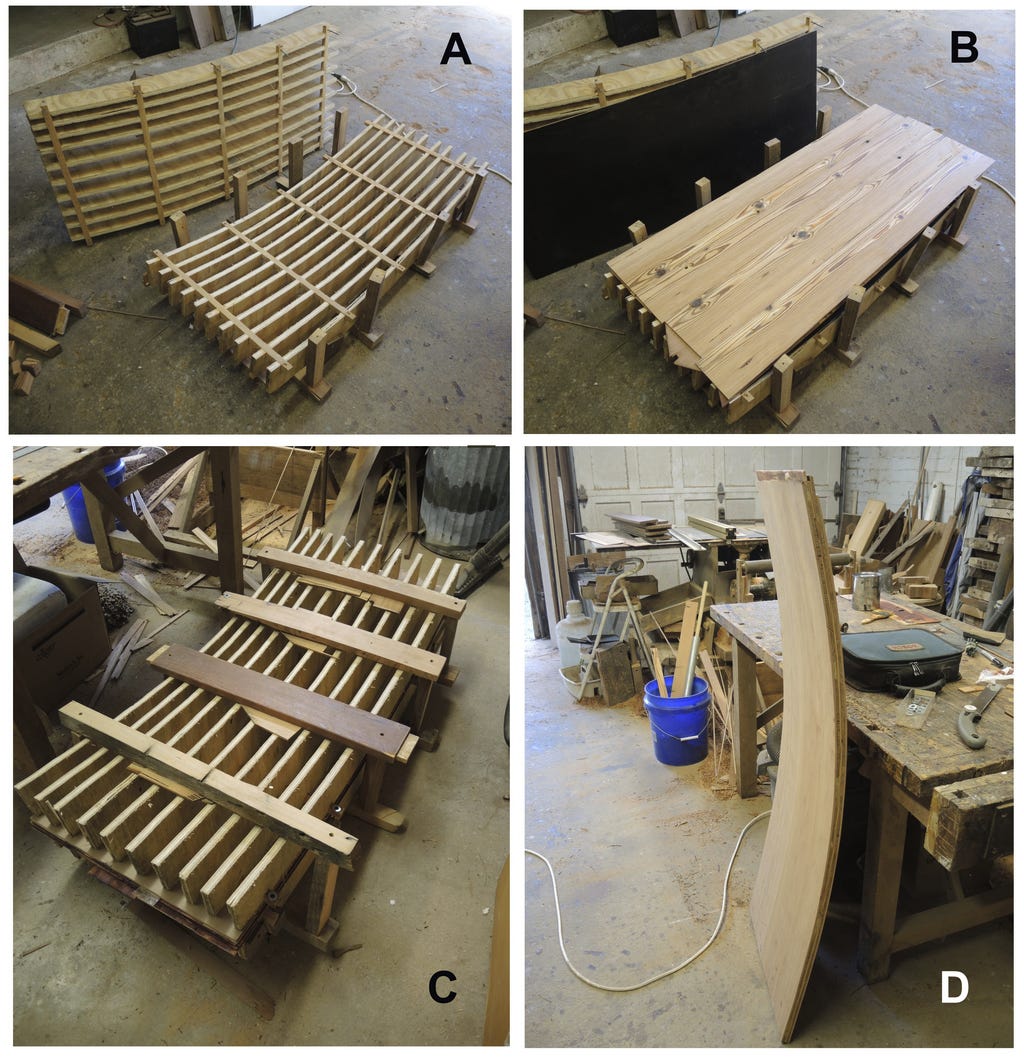
The next step was to make a form on which I could stack the glue-coated plys, then clamp them together until the glue sets rigidly. Resorcinol resin glue fit the bill nicely, and I bought a gallon of it along with a bucket of the powder catalyst, benzoyl peroxide (I think) whose unavoidable dust made my nose burn, so I turned my head whenever I worked with it, and did so gently and quickly.
The press was made from cheap pine plywood cut into curved pieces and combined side by side to create both an inner and an outer shape with a pleasant curvature derived from bending an aluminum strip . Now all that was needed was to lay the glue-covered core ply strips, alternating grain direction, with a cherry veneer on top and bottom. The sides were then pressed together using screws along the sides, as in the image below. When the glue set, this produced a nice curved side, of which I needed two.
The drawer fronts were also to be curved, and rather than build a second press, I modified the outer curvature of the original press, stacked the glued cherry veneers and pine core plys on top, put a thin piece of plywood on top, and cinched the whole thing to the form with multiple wood-and-screw clamps, as below.
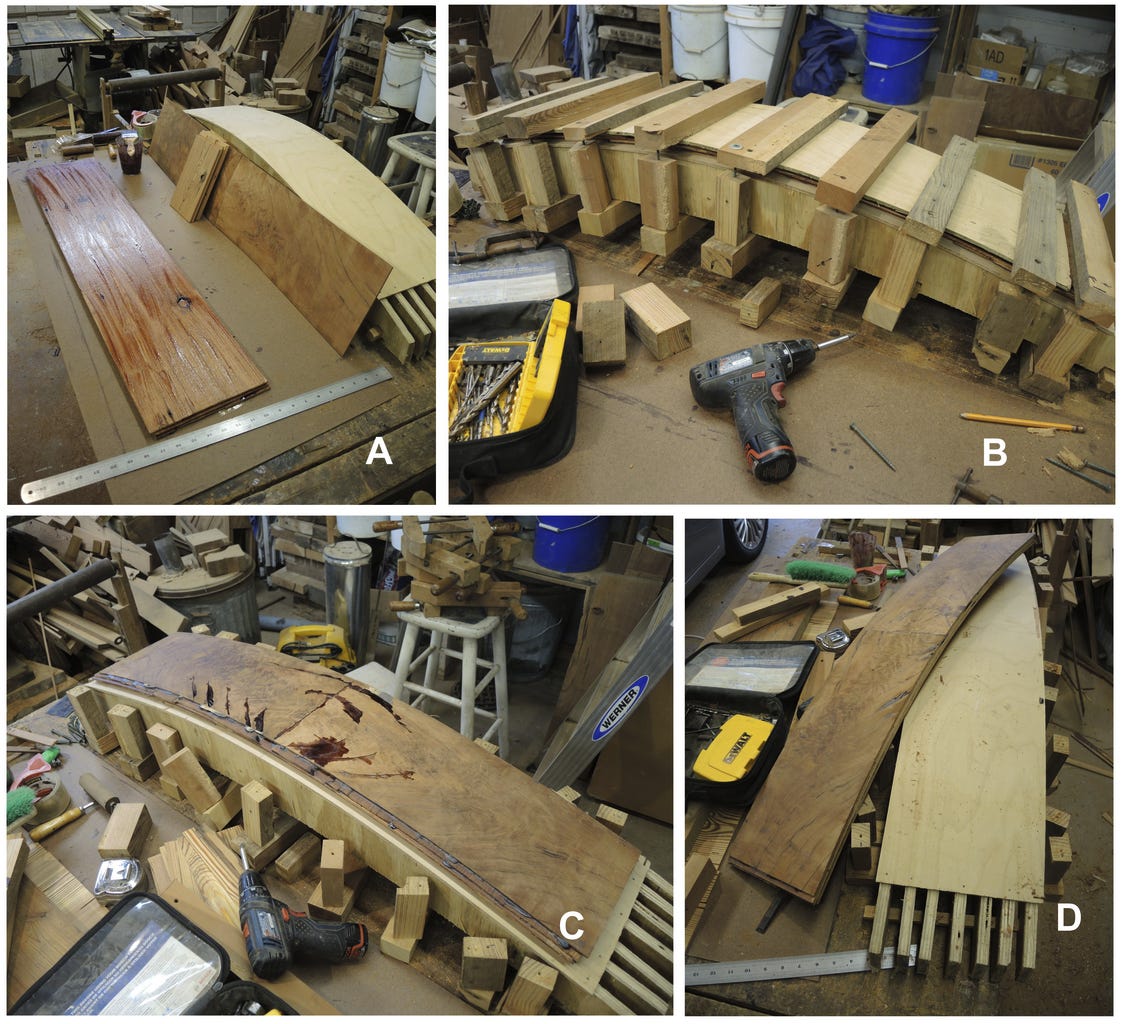
To allow me to press the warped veneers flat, I simply sawed slots along the maximum stress lines. The dark glue was squeezed out through these slots (see image C above), but as the wood was also dark, the end result was actually pleasing.
With the sides and the drawer fronts pin hand, the first stage of assembly required an internal frame that spaced the sides properly and supported the (future) drawers, allowing them to slide. This frame fixed the openings for the drawers, and I now cut these fronts to fit exactly into their openings, as below.
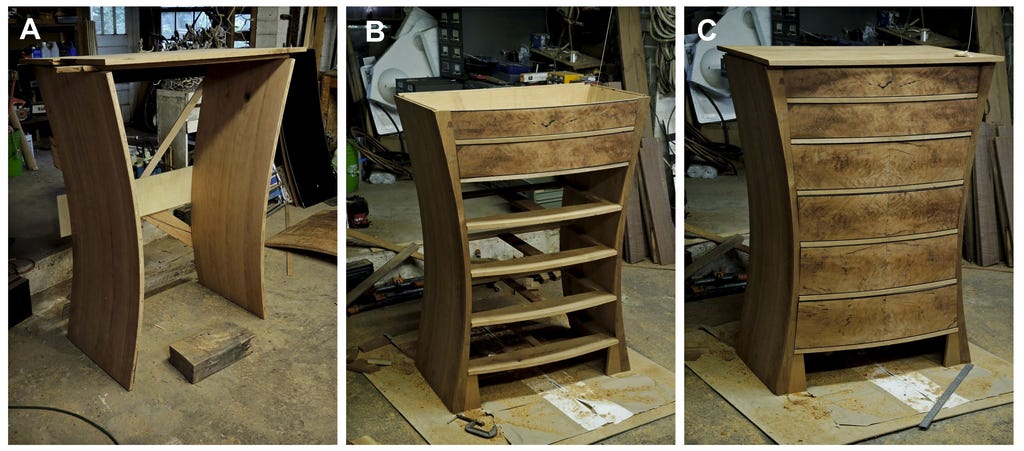
Of course, drawers need not only fronts, but also sides, backs, and bottoms, all cut to appropriate dimensions. All these pieces can be seen stacked on the internal frame below. It went without saying that most of the edges had to be trimmed with thin strips of ebony, a signature of my furniture for over 40 years. I am still using a stack of second grade guitar fret-boards that I got for a very good price from a guy in Portland.
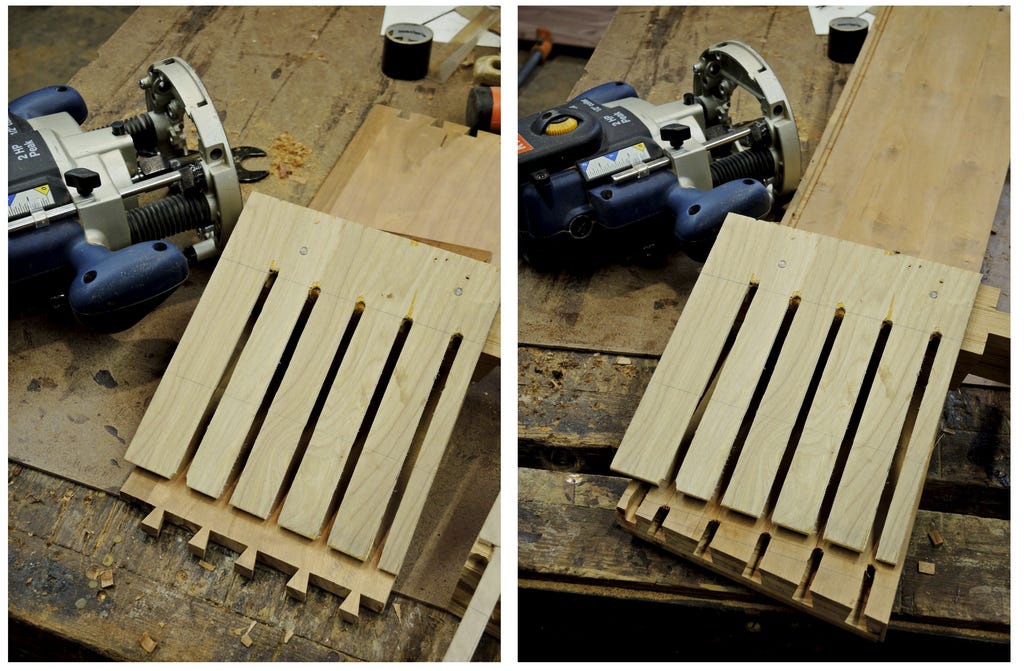
The fronts of good drawers are usually joined to the sides with dovetail joints so that opening a drawer does not pull the joint apart. Because I had a lot of dovetails to make, I made a jig that allowed me to space both the tails and pockets consistently. Errors of a small fraction of an inch can be disastrous for fitting.
Contrary to general advice, I used solid wood rather than plywood for drawer bottoms. To allow for shrinkage, the long grain of the bottoms runs parallel to the front, and the bottom is glued only into a groove on the bottom inside of the drawer front. The bottom side edges are fit (dry) into grooves in the drawer sides to allow contraction and expansion with changing temperature and humidity. The bottom is also not glued to the drawer back for the same reasons.
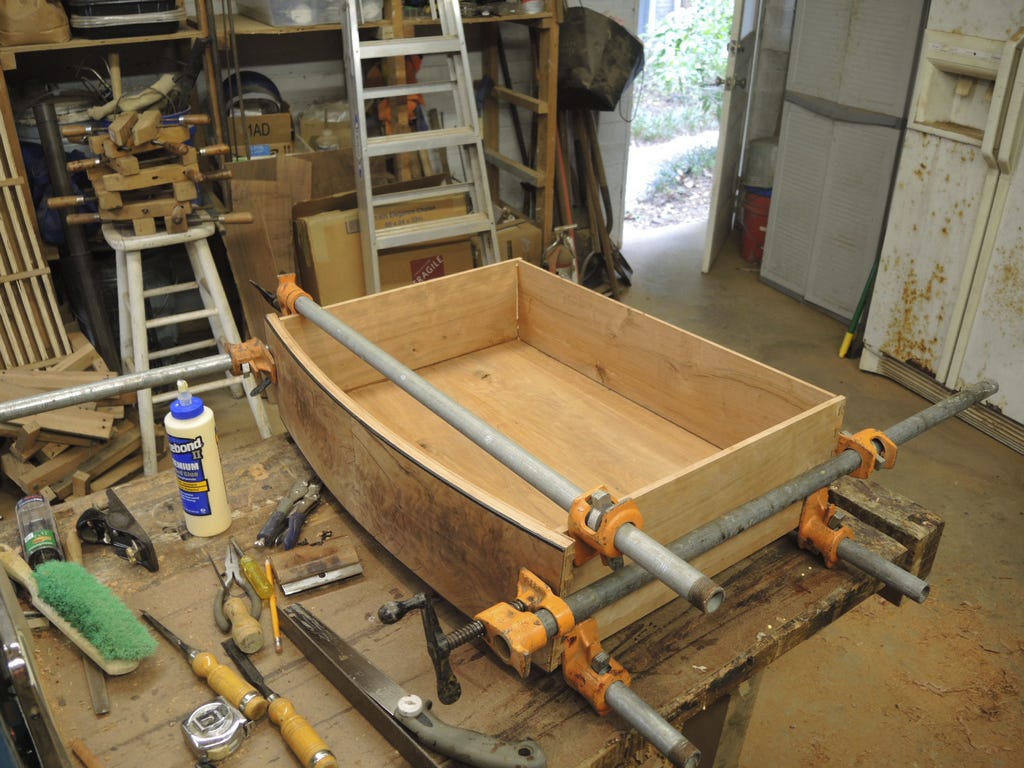
Perhaps you have already thought of this. Rather than make the drawer sides tilted to the angles of the fronts, for ease of construction and aesthetic reasons, I made them at right angles to the bottoms. This created an empty space and required side runners to keep the drawers in line. With this, the dresser was fully assembled, and after sanding, I gave it several coats of polyurethane. The ebony trim is nicely accentuated in the glow of the polyurethane varnish.
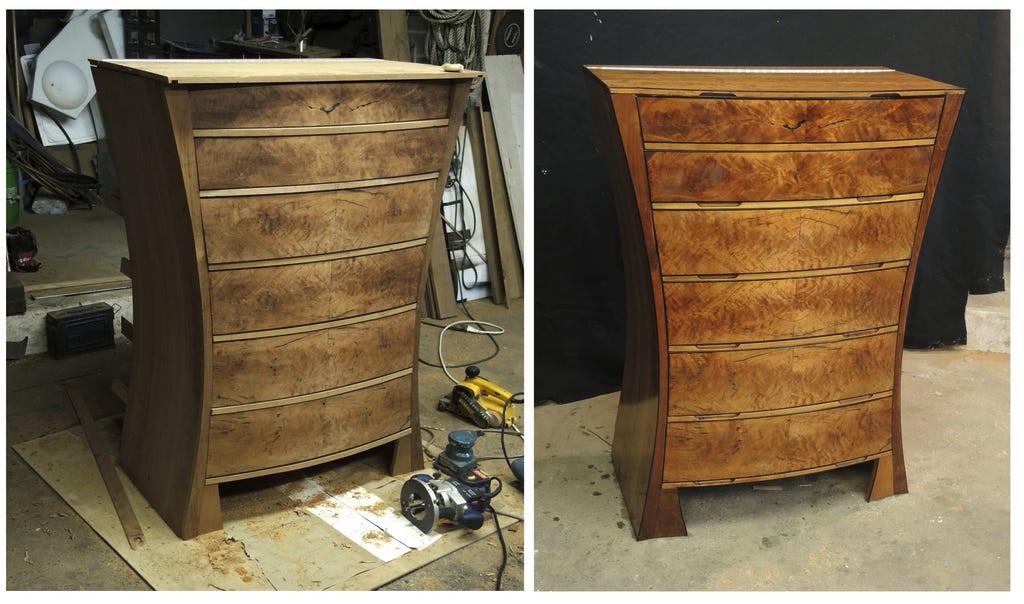
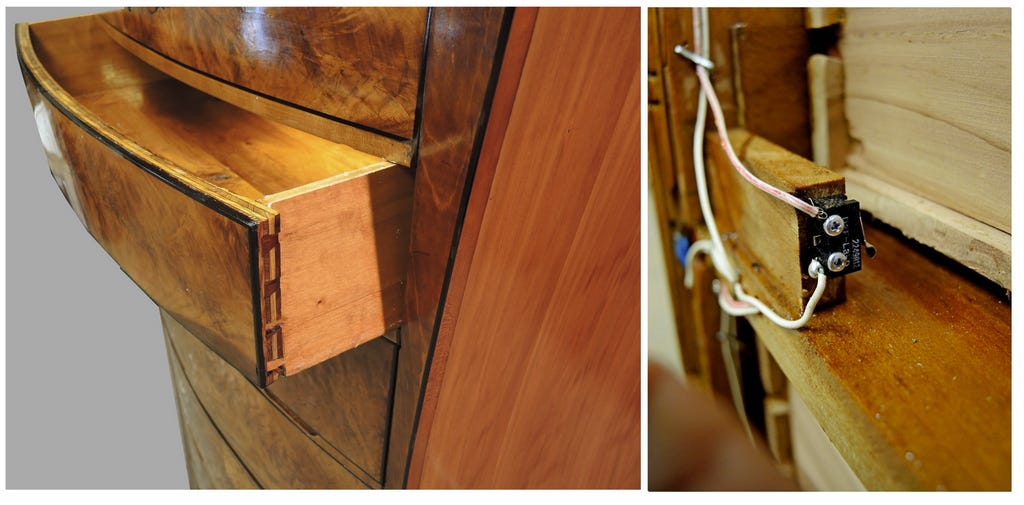
Ebony trim has been a constant since I first made use of it as a signature touch. Much more recently, I discovered the beauty and utility of LED strip lights. When I discovered ebony, LED lights had not yet been invented. So, the dresser had to sport drawers that were illuminated by internal strip lights when the drawers were opened. This way, my wife doesn’t have to rummage around in masses of dark clothing to find what she seeks. This required that the 12v LEDs be wired to operate through microswitches at the back of each drawer.
When Vicki asked me to build her a dresser, she also revealed that her jewelry storage was a mess and would I also build her a jewelry box? Well, I thought, why not combine them? Yes, why not? So, the top of the dresser is a hinged lid with a mirror on its underside, and you guessed it (!), the mirror is surrounded by strip LEDs so that Vicki can pick her jewelry and do her primping all at once.

Well, there’s not much more to say. Like most woodworkers, I could bore you with innumerable details, goofs, repairs, challenges, and so on, but I’ve probably provided too much of all that for most readers. Anyway, the dresser is in our bedroom, and I delight in its curves and flame patterns, and Vicki delights every time she must rummage for a dark item in a lighted drawer or opens the lid to pick out and put on her jewelry, adjusting it in the lighted mirror. The only thing that isn’t perfect is that if she doesn’t shut a drawer completely, the thin slit of light falls directly on my eyes as I am trying to sleep. I should have thought of that….



Walter, I always like to say that the types of tools and handiwork on one’s garage is a testimony to how good they are with their hands. And you are clearly very skillful in woodworking. Thanks for sharing these.
Wow. Beautiful!